Life in the Village and beyond, based around the interests of my life.

Life in the Village and beyond, based around the interests of my life. Sunset at Telegraph Point.

Wednesday, August 29, 2012

Building a Ukulele - Part 9 - Body, Fretboard and Finish

Things are coming together nicely now.
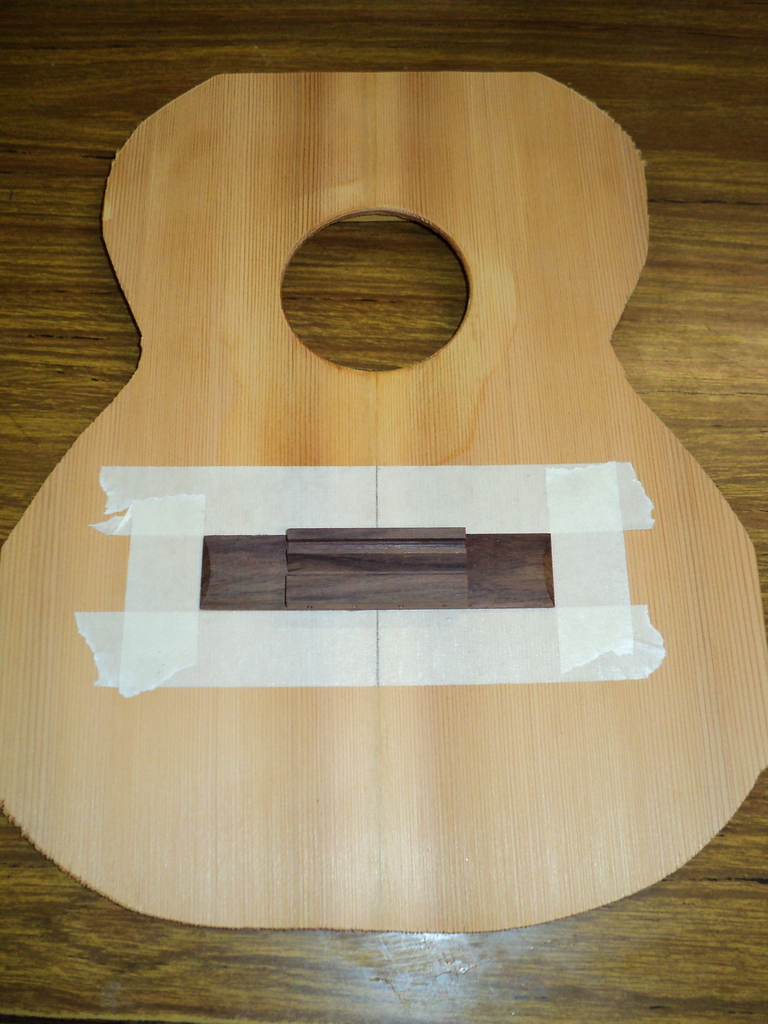
The top is glued in place, and I have finished the trimming around the edges.


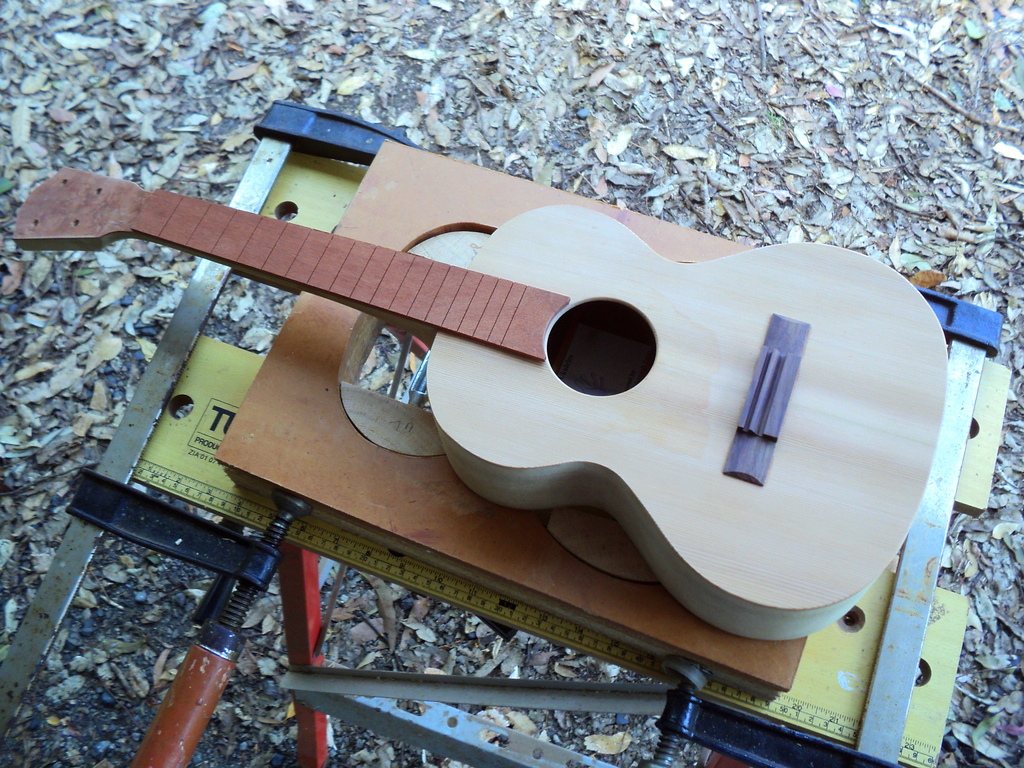
The body is assembled, the bridge attached and the fretboard taking shape and ready to glue to the neck.


Here is a trial fitting of the unformed fretboard before shaping.
 

Shaping is easily done with a block plane.  This is my Stanley number 18.


 Here it is after shaping, in a trial fitting.
I will finish the dot markers and fretwires before gluing this to the neck and body.


 In a moment of vanity, before the top was glued in place,  I decided to label my ukulele - and I have a notion of building more - so I gave myself a brand name - Riverside Ukuleles.
Seems appropriate for the Village of Telegraph Point, as we sit right beside the Wilson River.


After installing the mother of pearl dot markers and the side markers, the fretwires will be on and the fretboard ready to go.
I have found a very cheap and plentiful supply of side fret markers from the local markets - old knitting needles.  Just the right size and they can be cut to button length easily.


I am going to attempt a shellac finish on the soundboard and the body, and the old hands at the Hastings Woodworkers Guild tell me it will take many, many coats.

The western red cedar top is quite soft and needs hardening for protection, so I am hoping that the shellac finish will be appropriate.  Before this, I will tape the bridge and the end of the neck to protect them from over spatter, and fill the sound hole for the same reason.

Enough for the moment.
More next time .......

And happy woodworking to all ...........................

Sunday, August 26, 2012

Building a Ukulele - Part 8 - Neck, Fretboard and Bridge

Righteeeooho - here we go ho ................
The neck glue-up passed without incident, and it is now ready to accept the fretboard.

The scale on my tenor ukulele is 17 inches.  This determines the distance between the edge of the nut and the peak (break line) of the saddle.

With the soundboard temporarily in place, I can measure for the position of the bridge that carries the saddle.  I do this before gluing the top onto the body, so that I have some room to clamp the bridge during its glue-up fitting.  Too hard to do this after the top is fixed to the body.


There will probably be glue squeeze out during this, so I mask off the area around the bridge with tape. This also acts as a good locator for the position of the bridge which is bound to slide around a bit on the glue.


Once done, the soundboard and bridge can be set aside to dry while I mark out the fretboard.


The positioning of the frets is critical, and the good folks over at Stewart MacDonald have provided a free-use fret position calculator - mucho gratias my friends.

Armed with a printout of my 17 inch scale for 18 frets, I am good to go.
These have to be marked on the squared fretboard before tapering it, so that the fret positions are easily done with a try square. It is more accurate to use a marking knife for the fret marking, as it minimises the inaccuracies of pencil thickness.


The fret positions should all be marked from the edge of the nut, and not marked in increments from the previous fret mark.  Doing it the second way only multiplies any inaccuracy with every fret mark.
So, the ruler is clamped to the fretboard and all marks laid out before scribing them.  I have carefully ticked off all the fret marks as I go, to ensure I didn't miss any.

 
I'll cut them next, before tapering the fretboard to suit the neck that I have already built.


Now, the fretwires themselves have a very narrow seat, and so a very narrow-kerfed bladed saw is needed.  I tried several of my saws, before finding that my Veritas dovetail saw is just about perfect - narrow kerf, and very little set on the teeth.  It is a rip saw of course, designed for cutting dovetails along the grain, but serves very nicely as a crosscut saw in this instance.


 To help with the saw cuts and to keep them on track, I made up a little square saw guide.
Works a treat.


Got to wait a little, while glue dries.
Next time, I'll attach the top - and after that sets, I'll fix the fretboard.
Nearly finished - yippee ....................
Still got some time left for some strummin' practice -
Uke group night tonight - FUN!

Love life and live .........................

Friday, August 24, 2012

Building a Ukulele - Part 7A - Body Assembly (continued)

Yes, I know, glaciers move faster than this, yet things are happening.

Somewhere under all those clamps is the back of the ukulele attached to the body, which is held in the mould.  Use your imagination.


Here it is after the glue has dried - and before the edges are trimmed off.  As you can see, I have given the inside of the back a couple of coats of shellac to seal it. 
I will do the same for the inside of the top, and the interior of the body, before the top is fitted.  
I am hoping that by sealing both sides of the timber, I won't have as many issues with seasonal  timber movement.


Here is the back in all its glory - after trimming the edges.
Things are starting to look encouraging.


The linings for the top are attached in the same way as those on the bottom - good old clothes pegs!
Here, I am planing the linings level with the sides.  The top is flat, and I don't want any sticky-uppy bits in the lining to spoil it.
Some parts of the lining drifted upwards on the slipperiness of the glue before drying - no problem, easy fixed with the Lie Nielsen 101 small block plane.  This is such a good sized plane for this job, when even a regular block plane would be too large.


OK, the neck has to be fitted before the top goes on, so that I can get clamping room - to hold it while it dries.  The second reason is simply that the top gets glued over the heel block, and the neck tenon.
Here is a trial fitting.
That little piece of raised tenon has to be removed, while the neck is raised to the level of the finished top.  This is important, because the fretboard is glued on top of both - and they must be in the same plane.

Next step will be to glue the neck in position, before adding the top.
Starting to get exciting, isn't it!

That's all for now, the glacier needs to rest.
Love life and live ...............

Saturday, August 18, 2012

Building a Ukulele - Part 7 - Body Assembly

The various parts are sloooooowly coming together - a right shoulder injury is hampering my activities mightily at the moment.  It is taaaking .... sooo ...... looong to get the smallest tasks completed.

Serendipitously, it gives me an even greater appreciation of the courage and abilities of the competing para-olympians.  I really admire those athletes! Two weeks to go - bring it on!

OK, here are the bits.
Let's have a go at putting things together.


The body has had an embellishment added to the toe - in the form of the same burl veneer as the headboard.  Two reasons for this - to tart it up a bit, and provide a little balance in the design - and the second reason is to cover a badly matched join where the two sides met.


By making it wedge shaped, the filler piece can be cut oversize, slid into place and glued - then the top and bottom trimmed off.  Looks OK I think.

I'll be fitting the back first, so the back linings are attached.

Linings for the back are glued in place - hooray for clothes pegs!


Here are the back linings after drying.
I'll have to attach the neck before the top goes on, to give me room to clamp the neck tenon in place.

I'll fit and glue the back next, as the design of my neck means it has to be attached from the top, and the fretboard over the top of the soundboard.  Do these later.

I hoped to have more done than this, but ...... life intervenes .............
.... the shoulder, doc - the shoulder ...................owwwch!

Until next time ................

Love life and live ..........

Tuesday, August 7, 2012

Building a Ukulele - Part 6 - The Parts Come Together

Things have slowed down on the ukulele building front, while I have to attend to other matters, but I have found time to keep chipping away at it in little bits.


The neck needed some shaping around the heel, and after many attempts with different tools, I found an old fashioned sloyd type knife to be the best choice.  I think I got this one with an AWR subscription years ago.  It is a beauty.
This part of the heel is awkward for handtools, and the knife handles it easily.  I will be using it even more now that I have realised how versatile it is.

Here is the shaped neck at the heel.  Not your conventional tapered point, but will suit me for this - my first ukulele.  It resembles the heels on cutaway ukuleles, and will provide more surface area for the glue -up of the neck to body.


Here are the parts prior to glue up of the end blocks and curved sides.  End blocks are cedar, and I have pre-cut the slot in the heel block to take the tenon on the end of the neck.
The near finished back is also shown in this photo.


Here is the body glued up in the mould with end blocks in place.  This shows the body as it is seen from the back.

Making the Soundboard

The soundboard is made from western red cedar, that has been ripped from planks from my brother in law's renovated kitchen.  I was really lucky to score some old growth, tight grained timber that had been quarter-sawn.  Look how tight those growth rings are on the timber below.  Perfect.


Before I assemble the soundboard, it is important to lay it out, and mark the position of the sound hole.  The sound hole patch has to be glued on to the back before the sound hole is cut, but it is a good idea to drill a small marker hole in the soundboard before gluing, so it can be found again for the cut.  This is because the drawn circle will be covered by the sound hole patch, which is there to re-inforce the area around the sound hole.

Good old Millers Falls Buck Rogers 308 to the rescue.


After the re-inforcing patch is dry, it is time to cut the sound hole.  I use the rosette cutter that I made previously, and I cut from both sides.  Here I am cutting the front. The rosette cutter does a nice job.  I am very happy with it.

OK, going to take a break for a few days now while glued things dry.  Next task will be to brace and finish the soundboard, before adding the linings to the body.  The linings will provide the surface area for the front and back to attach to the sides.

Not long to go .............
Can't wait.

Love life and live .......................

Wednesday, August 1, 2012

Building a Ukulele - Part 5A - Backs and Necks Continued

A few more steps before the back is finished.  Firstly the bracing needs thinning down to reduce weight, and hopefully improve the sound.


I use a Stanley 102 block plane, which suits this task very well, as it has curved sides.  A straight sided block plane would put undue pressure on the already curved back and may cause cracking.  The little wood block is used as a side support for the brace while planing.

Lie Nielsen claim that the tiny violin plane was based on the Stanley 101, but I think that it more closely resembles the 102 - which is itself a small block plane.  The 102 is one of the simplest of all planes with no adjuster, yet it works like a charm.

You can see the similarities here.

Once the bracing has been shaped to an appropriate profile, it is time to pare off the ends - to create a smoother interface with the sides, and to fit into the linings.

Traditionally, this has been done with a paring chisel, and the ends are scalloped in a rounded taper.

I used a long handled Japanese paring chisel as it gives more control in this situation.


The ukulele back is rounded from the application of the curved bracing, so the edges need some support while paring.

An offcut from the neck serves well here.


Here is the near finished back showing both sides.

It will sit on the body which is slowly taking shape.
I have bent one of the sides, and it is sitting in the mould, drying, while I work on the neck. The bending was a tortuously slow process of heating, bending a little, heating some more, bending a little more - and trying it on the curve of the mould - repeat over and over - ad infinitum.


It took me a full morning to form up that one side.

The Neck
Now to put the finishing touches to the neck.   I was dreading this, thinking that I would either utterly destroy it, or end up with something resembling an Irishman's buckthorn shillelagh.
Happily, it went well, and I am pleased with the result.


After rough shaping with coarse and fine rasps, I started on coarse sandpaper - 80 grit in this case.


I then worked my way through four more grades of sandpaper - from coarse 120 grit up via 180 and 220 to finish on 320 grit.
There were still some parts that were a little rough and needed the attention of a scraper.


Here it is near finished.
While it doesn't resemble those immaculate CNC creations that grace commercial ukes, it isn't too shabby either.
I have glued a piece of eucalypt burl veneer - with a similar colour to rosewood - to the face side of the headstock.  It should dry overnight.
I'll cut it to shape tomorrow after it dries.

All in all, not a bad day's work.

I am beginning to wonder why ukuleles don't cost around $1000 each, given what I am finding has to go into their construction.

Next step will be part two of the body - I am getting the bends just thinking about it ..........

Love life and live ..................