Previously, I have cut the four halves from a single piece of mango, and the bookmatched pairs were glued together to make two sets of skins - one for the front and one for the back of the ukulele.
The piece with the most figure will become the back - since the front will have a sound hole cut into it and a bridge glued onto its surface. So it will lose some of its beauty.
The Back
The back needs cross bracing as well as a strengthening piece glued down the spine.
I start with the cross braces because the back has to have a radius, and it is easier to curve the back before applying the stiffening of the piece up and down the middle.
The cross braces are radiused on their edge to be glued to the back skin, and this gives the curve to the back of the uke.

A normal hour-glass shaped uke has three cross braces, but this cutaway design has so much strengthening at its neck, that the third brace up there may well limit its acoustic qualities by making it too stiff. So I am only using two braces this time.
I'll see how well it plays, and if it is a bad move I will correct it on my next uke.

Traditionally cross braces are made from quarter sawn spruce.
I don't have any, so I am using Huon Pine as a substitute.
I have made these slightly over-sized, and will plane them to shape once the glue is dry.

The edges are pared down to around 1/16inch where they meet the sides of the ukulele body. I use a sharp paring chisel for this task.
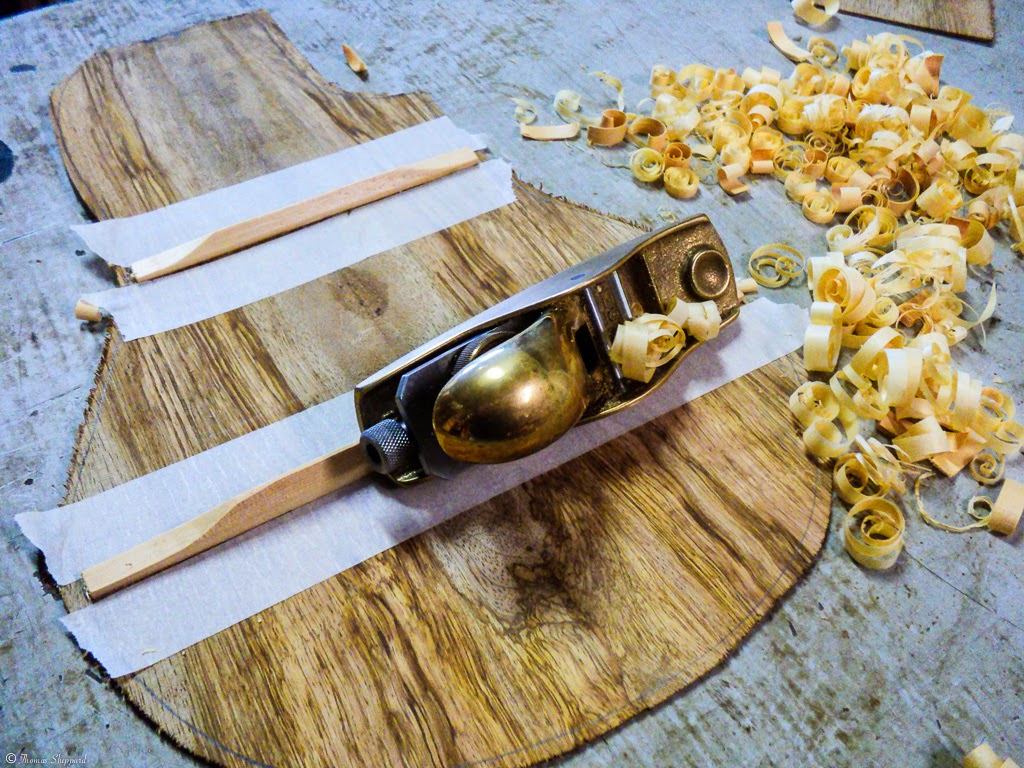
Once the ends are pared, I lay down some masking tape to protect the skin from damage by the edge of the block plane, before planing the cross bracing to a ridge across its top. The tape is then removed.

Now I glue the strengthening strip along the spine of the back. This is cross grained timber to add strength to this join in the bookmatched pair that make up the back skin. I am using the same mango timber that makes up the body - only the grain now runs at right angles to the grain of the back.
The ridged cross braces can now be clearly seen.
This is left to dry while I work on the front soundboard.
The Soundboard
The front of the uke - the soundboard - needs special attention in a specific order.
A re-inforcing patch is glued on the back of the sound hole before it is cut out,

This adds strength to this fragile area.
Here they are laid out before gluing.
I cut the sound hole with the rosette cutter that I have made previously.

Cross braces are added above and below the sound hole for the same reason.
Once these are dry I then add the fan braces that will stiffen the body of the front skin and provide the stiffness needed to carry the bridge.

In my next post, I'll lay out the parts made thus far to give an overview of the assembly to come.
Happy shavings to all
the post which you have shared is really nice. pictures are simply awesome.
ReplyDeleteThank you BP.
ReplyDeleteI have been busy, but managed to glue the back to the body today.
I will have pictures in my next post.
Cheers